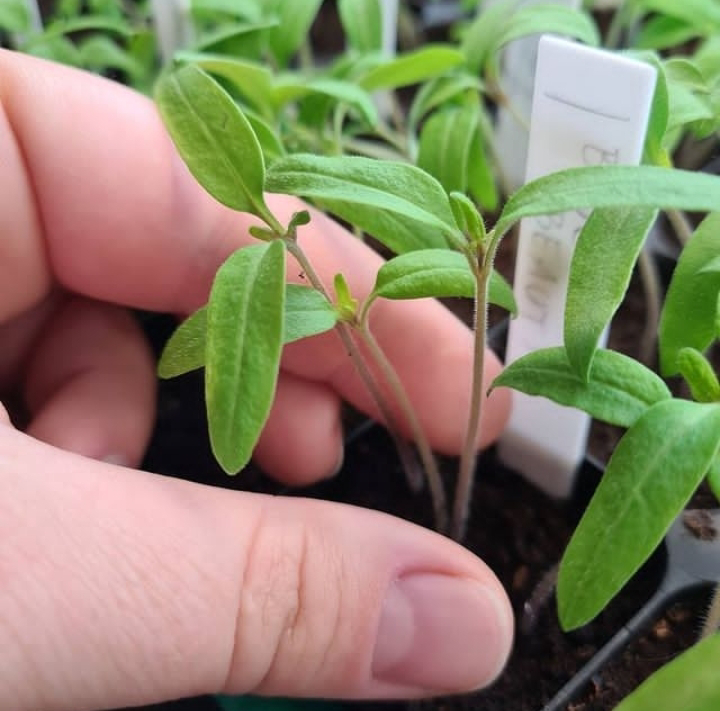
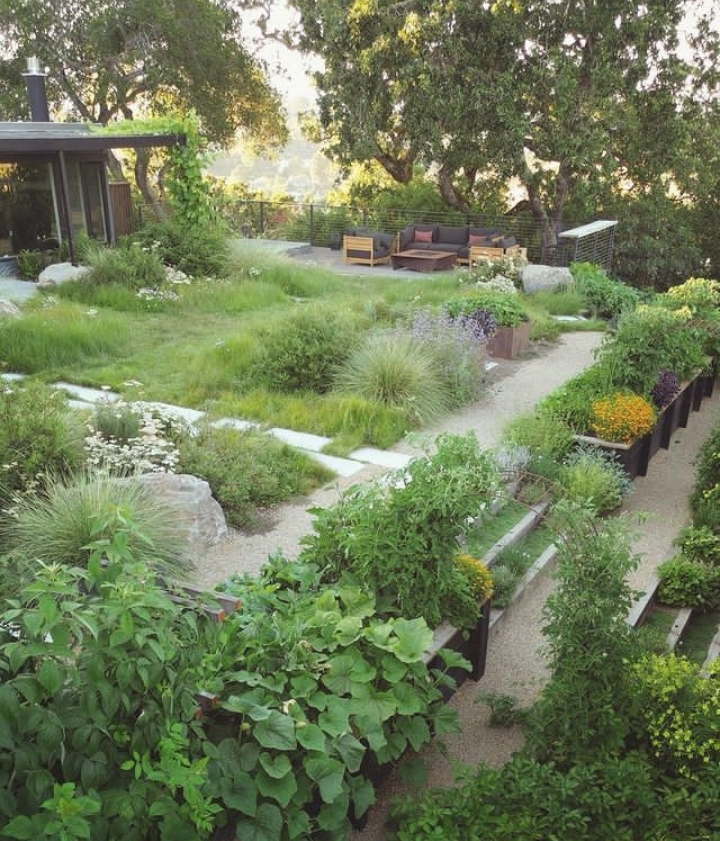
11 Tomato Seeding Transplanting Guide

To properly transplant tomato seedlings, follow these steps:

1. Seedling Preparation: Start with healthy seedlings that are about 6-8 weeks old and have sturdy stems and well-developed leaves.
2. Timing: Transplant outdoors after the last frost date in your area. Soil temperature should be around 60-70°F (15-21°C).

3. Location: Choose a sunny spot with well-draining soil. Prepare the soil by adding compost or organic matter.
4. Hardening Off: Gradually acclimate seedlings to outdoor conditions by placing them outside for a few hours each day, gradually increasing the time over a week.

5. Digging Holes: Dig holes slightly deeper than the seedling's root ball and spaced about 2-3 feet apart for determinate varieties and 3-4 feet apart for indeterminate varieties.
6. Transplanting: Gently remove seedlings from their containers, holding them by the leaves, not the stem. Place the seedling in the hole, burying the stem up to the first set of leaves. This encourages root growth along the buried stem.
7. Watering: Water the seedlings immediately after transplanting to help settle the soil. Provide consistent watering to keep the soil evenly moist.

8. Mulching: Apply a layer of mulch around the seedlings to conserve moisture and prevent weed growth.

9. Support: Set up stakes, cages, or trellises to support the plants as they grow.

10. Fertilizing: Wait a few weeks before applying a balanced fertilizer. Too much nitrogen early on can promote excessive foliage growth.

11. Pruning: Pinch off any lower leaves that touch the ground to prevent disease. As the plant grows, you can also prune suckers (side shoots) for indeterminate varieties to encourage better fruiting.
Remember, tomato plants are sensitive, so handle them gently during transplanting. With proper care, your seedlings should thrive and produce delicious tomatoes.

15 tips in Tomato Seeds Effectively

Certainly! Here are some effective methods for starting tomato seeds:
1. **Choose Quality Seeds:** Begin with high-quality tomato seeds from a reliable source to ensure healthy plants.

2. **Timing:** Start seeds indoors 6-8 weeks before the last frost date in your area. Transplant outdoors after the danger of frost has passed.

3. **Seed Trays or Pots:** Use seed trays, pots, or seedling cells with good drainage to sow seeds. Ensure they have enough space to grow initially.
4. **Seed Starting Mix:** Use a well-draining seed starting mix or create your own mix by combining peat moss, perlite, and vermiculite.

5. **Sow Seeds:** Plant seeds 1/4 to 1/2 inch deep, covering them lightly with soil. Space them about 2 inches apart.

6. **Moisture:** Keep the soil consistently moist but not soggy. Use a spray bottle to mist the surface or a humidity dome to maintain moisture.

7. **Temperature and Light:** Maintain a consistent temperature between 70-75°F (21-24°C) for optimal germination. Provide 14-16 hours of bright, indirect light daily using fluorescent or LED grow lights.

8. **Thinning:** Once seedlings have a few true leaves, thin them to one strong seedling per cell or pot.
9. **Fertilization:** After the first set of true leaves appear, begin fertilizing with a diluted, balanced liquid fertilizer.

10. **Harden Off:** Before transplanting, gradually acclimate seedlings to outdoor conditions over a week. Start with a few hours of sunlight and gradually increase the time.

11. **Transplanting:** Transplant seedlings into larger pots or directly into the garden when they have 2-3 sets of true leaves.

12. **Spacing:** Plant tomato seedlings 18-36 inches apart, depending on the variety, to allow for proper air circulation and growth.

13. **Support:** Install tomato cages, stakes, or trellises to support the plants as they grow.

14. **Watering:** Water consistently, keeping the soil evenly moist. Avoid overhead watering to prevent diseases.

15. **Mulching:** Apply organic mulch around the plants to conserve moisture and prevent weed growth.

Remember, tomato plants thrive in warm conditions, so ensuring proper temperature, light, and care during the early stages will set the foundation for healthy and productive tomato plants.

Composting in growing Tomato

be happy to provide more information! 

When composting for tomato plants, it's essential to maintain a pH level within the ideal range of 6.0 to 6.8. Compost can influence pH, generally tending to slightly lower it. 
Regularly testing your soil's pH and amending with lime or sulfur as needed can help ensure your tomato plants thrive.
 Additionally, composting enriches the soil with nutrients and improves its structure, promoting healthy root growth and overall plant development.

Tomato Planting location idea

Choosing the right location for growing tomatoes is essential to ensure a successful and productive harvest. Tomatoes are a popular and versatile crop, loved by many for their delicious taste and use in various dishes. To achieve the best results, several factors must be considered when

 selecting a suitable location for tomato planting.

**1. Sunlight:**
Tomatoes are sun-loving plants that require ample sunlight to thrive. Choose a location that receives at least 6-8 hours of direct sunlight each day. A south-facing area in your garden or yard is usually the best option. Insufficient sunlight can lead to leggy growth, reduced flowering, and poor fruit development.

**2. Soil Quality:**
The quality of the soil is crucial for tomato growth. Well-draining soil that is rich in organic matter is ideal. Conduct a soil test to determine its pH and nutrient levels. Tomatoes prefer slightly acidic to neutral soil (pH 6.2-6.8). You can amend the soil with compost or other organic materials to improve its structure and fertility.

**3. Drainage:**
Avoid areas with poor drainage, as excessive waterlogged soil can lead to root rot and other diseases. Ensure that water can drain away from the planting area to prevent water accumulation around the roots. Elevated beds or raised planting rows can help improve drainage.

**4. Wind Protection:**
Strong winds can damage tomato plants and hinder their growth. Select a location that provides some natural wind protection, such as near a fence, wall, or other structures. If your chosen area is prone to strong winds, consider using windbreaks or planting wind-resistant varieties.

**5. Space and Air Circulation:**
Tomato plants need adequate space for their growth and air circulation. Avoid overcrowding by planting tomatoes at least 2-3 feet apart. Sufficient spacing allows proper airflow, reducing the risk of disease and promoting healthy plant growth.

**6. Temperature:**
Tomatoes are sensitive to frost and cold temperatures. Plant them after the last frost date in your area. If you live in a cooler climate, consider using methods like cloches or row covers to protect young plants from unexpected cold snaps.

**7. Proximity to Water Source:**
A convenient water source is essential for maintaining consistent moisture levels in the soil. Ensure that your chosen location is close to a water supply, as tomatoes require regular watering, especially during the growing season and fruiting stage.

**8. Disease Prevention:**
Rotating crops and practicing proper sanitation are important for preventing soil-borne diseases. Avoid planting tomatoes in the same location where they were grown the previous year to reduce the risk of disease buildup in the soil.

**9. Access and Convenience:**
Select a location that is easily accessible for planting, tending, and harvesting. Consider factors like proximity to tools, storage, and your daily routine. A convenient location makes it more likely that you'll provide proper care to your tomato plants.

**10. Companion Plants:**
Companion planting can benefit tomato plants by attracting beneficial insects, deterring pests, and enhancing soil health. Consider planting tomatoes near compatible companions like basil, marigold, or nasturtiums.

**11. Container Growing:**
If you have limited space or poor soil quality, you can successfully grow tomatoes in containers. Choose large pots with good drainage and place them in a sunny location on a patio, balcony, or other suitable area.

In conclusion, selecting the right location for growing tomatoes involves careful consideration of factors such as sunlight, soil quality, drainage, wind protection, temperature, water source, disease prevention, access, and companion planting. By providing optimal growing conditions, you can enjoy a bountiful harvest of delicious and healthy tomatoes. Remember that proper planning and preparation contribute to the success of your tomato garden.

10 Types of Tomato in Gardening

Sure, there are many different types of tomato varieties you can consider for your gardening. Some popular ones include:

1. **Cherry Tomatoes**: Small, sweet, and bite-sized tomatoes. Examples include "Sweet 100" and "Sun Gold."
2. **Roma Tomatoes**: Oval-shaped and meaty, great for sauces and canning.
3. **Beefsteak Tomatoes**: Large, juicy tomatoes often used for slicing and sandwiches.

4. **Heirloom Tomatoes**: Varieties that have been passed down through generations, known for unique colors and flavors.

5. **Grape Tomatoes**: Small and oblong, often used in salads and snacking.

6. **Plum Tomatoes**: Similar to Roma tomatoes, good for making sauces and pastes.

7. **Indeterminate vs. Determinate**: Indeterminate varieties keep growing and producing fruit throughout the season, while determinate varieties produce a set amount of fruit and then stop.

8. **Hybrid Varieties**: These are bred for specific traits, like disease resistance or uniformity.

9. **Paste Tomatoes**: These have less water content and are good for making sauces and pastes.

10. **Green Tomatoes**: Harvested before fully ripened, often used in fried green tomato dishes.

Remember, each variety has its own growing requirements and flavor characteristics, so choose the ones that best suit your gardening goals and taste preferences.

Hydroponic and Aquaponics in urban Farming

Hydroponics and aquaponics are innovative methods of urban farming that allow for the cultivation of plants and fish in controlled environments without the need for traditional soil-based agriculture. 

Here's a detailed overview of each:

1. Hydroponics:

Hydroponics is a soilless farming technique that involves growing plants in nutrient-rich water solutions. Plants receive all the essential nutrients they need directly from the water, promoting rapid growth and high yields. There are several hydroponic systems, including:
   - Nutrient Film Technique (NFT): 
Plants grow in a thin film of nutrient-rich water, with roots suspended in the air.

   - Deep Water Culture (DWC): 
Plant roots are submerged in a nutrient solution, providing continuous access to nutrients.

   - Drip System: Nutrient solution is dripped onto plant roots, allowing for precise nutrient delivery.

   - Aeroponics: Plant roots are misted with a nutrient solution, maximizing oxygen exposure.
Advantages of hydroponics in urban farming:
   - Faster plant growth and higher yields.
   - Efficient use of water and nutrients, reducing waste.
   - Minimal need for space, making it suitable for urban environments.
   - Reduced risk of soil-borne diseases and pests.

2. Aquaponics:
Aquaponics combines hydroponics with aquaculture (fish farming) in a symbiotic system. Fish are raised in tanks, and their waste provides nutrients for the plants. As the plants absorb these nutrients, they help purify the water for the fish. 
The key components of an aquaponics system include:
   - Fish tanks: Fish waste produces ammonia, which is converted into nitrites and nitrates by beneficial bacteria.

   - Grow beds: Plants are grown in a medium (often clay pellets) within grow beds that receive nutrient-rich water from the fish tanks.

   - Beneficial bacteria: These bacteria break down fish waste into usable nutrients for plants.

Advantages of aquaponics in urban farming:
   - Simultaneous cultivation of fish and plants, providing a sustainable protein source and fresh produce.
   - Reduced need for external fertilizers, as fish waste serves as a natural nutrient source.
   - Efficient use of water, with the aquaponics system recycling water between fish and plants.
   - Natural filtration process improves water quality and reduces the need for water changes.

Both hydroponics and aquaponics offer exciting possibilities for urban farming by maximizing space and resources while minimizing environmental impact. Each method has its own unique benefits, and their adoption in urban settings can contribute to increased food production and enhanced sustainability.

Urban Hydroponic - Soil free Farming

Growing vegetables without soil, a practice known as hydroponics, has gained significant popularity in urban environments due to its space-efficient and resource-saving nature. In this innovative method, plants are cultivated in nutrient-rich water solutions instead of traditional soil. Various hydroponic systems exist, such as the Deep Water Culture, Nutrient Film Technique, and Aeroponics.


In a hydroponic setup, plants receive the essential nutrients they need directly through their root systems submerged in the nutrient solution. This precise nutrient delivery promotes faster growth and higher yields compared to conventional soil-based farming. Additionally, the controlled environment of urban hydroponics reduces the risk of pests, diseases, and adverse weather conditions, resulting in healthier and more reliable harvests.
To create an urban hydroponic garden, one requires a few key components. First, a growing medium is used to support the plants' roots and anchor them in place. Common options include coconut coir, perlite, and vermiculite. Second, a nutrient solution is formulated to provide the plants with essential minerals, such as nitrogen, phosphorous, and potassium, along with trace elements. This solution is continuously circulated or intermittently flooded to ensure consistent nourishment.

Light is another crucial factor in hydroponics. In indoor or vertical setups, energy-efficient LED lights are often used to mimic sunlight and provide the necessary spectrum for photosynthesis. Climate control, including temperature and humidity regulation, is essential to optimize plant growth and prevent stress.

Urban hydroponics allows year-round cultivation, making it ideal for limited space scenarios. It promotes sustainable agriculture by minimizing water usage, as the recirculating systems consume significantly less water than traditional farming. Moreover, it reduces the need for pesticides, making it an eco-friendly option.

In conclusion, hydroponic farming without soil offers a compelling solution for urban environments, enabling efficient, high-yield vegetable production in limited spaces while conserving resources and promoting sustainable practices.

Rooftop garden urban Guide

Starting a rooftop garden in urban gardening can be a rewarding and environmentally-friendly endeavor

. Here's a step-by-step guide to help you get started:
1. **Assessment and Planning:**
   - Evaluate the structural integrity of your rooftop to ensure it can support the weight of a garden.
   - Decide on the type of garden you want: vegetable, herb, ornamental, or a mix.
   - Consider the amount of sunlight, wind exposure, and climate conditions your rooftop receives.

2. **Permissions and Regulations:**
   - Check with your local authorities or building management for any regulations or permits required for rooftop gardens.

3. **Materials and Supplies:**
   - Gather necessary supplies such as containers, soil, plants, seeds, compost, and tools.
   - Choose lightweight, well-draining planting containers to prevent excess weight on the rooftop.

4. **Soil Preparation:**
   - Prepare a high-quality, lightweight potting mix or substrate suitable for your chosen plants.
   - Ensure proper drainage by adding gravel or perlite to the bottom of containers.

5. **Plant Selection:**
   - Choose plants that are well-suited for your rooftop's conditions, such as drought-tolerant varieties for hot and sunny areas.
   - Consider vertical gardening options like trellises, hanging baskets, and wall-mounted planters to maximize space.
6. **Planting and Arrangement:**
   - Follow planting guidelines for each type of plant.
   - Arrange plants strategically to make the most of available sunlight and space.
7. **Watering and Irrigation:**
   - Install a proper irrigation system to ensure consistent watering.
   - Use a drip irrigation system or self-watering containers to minimize water wastage.

8. **Maintenance:**
   - Regularly water, fertilize, and prune your plants as needed.
   - Monitor for pests and diseases and take appropriate action.

9. **Composting:**
   - Set up a small composting system to recycle kitchen waste into nutrient-rich compost for your garden.

10. **Harvesting:**
   - Harvest crops when they're ready to ensure the best flavor and quality.
   - Practice proper harvesting techniques to encourage continuous growth.

11. **Community Involvement:**
   - Engage with neighbors and the community by sharing your gardening knowledge and produce.
   - Consider organizing workshops or garden tours to inspire others.
12. **Seasonal Changes:**
   - Adjust your garden's layout and plant selection based on seasonal changes and weather conditions.

Remember, patience and experimentation are key to successful rooftop gardening. Regular care and attention will help your garden thrive and contribute positively to your urban environment.

What is the urban farming and working

Urban farming is the practice of growing and producing food within urban or city environments. It involves utilizing a variety of techniques and strategies to cultivate crops, raise animals, and produce food products in limited urban spaces. Urban farming aims to address food security, promote sustainability, and increase access to fresh and locally grown produce in densely populated areas.
Here's a more detailed explanation of how urban farming works:

1. **Space Utilization**: Urban farming makes use of various spaces, including rooftops, balconies, vacant lots, community gardens, indoor areas, and even walls. Vertical farming involves growing plants in stacked layers or vertically inclined structures, maximizing the use of limited space.

2. **Growing Methods**:
   - **Container Gardening**: Plants are grown in containers such as pots, planters, or raised beds. This method is suitable for small spaces and allows for easy mobility of plants.
   - **Hydroponics**: Plants are grown without soil, with their roots immersed in a nutrient-rich water solution. This method conserves water and allows for precise control over nutrients.
   - **Aquaponics**: A combination of aquaculture (raising fish) and hydroponics, where nutrient-rich water from fish tanks is used to nourish plants, and the plants, in turn, purify the water for the fish.
   - **Aeroponics**: Plant roots are suspended in air, and a nutrient-rich mist is sprayed directly onto the roots. This method is highly efficient in water usage.
   - **Greenhouses**: Enclosed structures extend the growing season and protect plants from adverse weather conditions.

3. **Crop Selection**: Urban farmers often choose crops that are well-suited for their specific environment and growing methods. Leafy greens, herbs, tomatoes, peppers, and microgreens are popular choices due to their compact growth and quick harvesting cycles.
4. **Resource Efficiency**: Urban farming emphasizes efficient resource use, such as water conservation through drip irrigation, rainwater harvesting, and reusing greywater from households.

5. **Community Engagement**: Urban farming fosters community involvement and collaboration. Community gardens and shared spaces promote knowledge sharing, social interaction, and a sense of ownership.

6. **Local Food Production**: By producing food within the city, urban farming reduces the need for long-distance transportation, decreasing the carbon footprint associated with food distribution.

7. **Education and Outreach**: Many urban farming initiatives include educational programs to teach residents about gardening, agriculture, nutrition, and sustainable practices.

8. **Economic Opportunities**: Urban farming can create local job opportunities, from farmers and gardeners to educators and entrepreneurs.

9. **Challenges and Considerations**:
   - Limited space and sunlight in urban areas may require creative solutions.
   - Soil quality and contamination issues need to be addressed.
   - Zoning regulations and permits can impact the establishment of urban farms.
   - Adequate knowledge and skills are essential for successful urban farming.

Overall, urban farming offers a sustainable and localized approach to food production, contributing to healthier communities, reduced environmental impact, and increased resilience in the face of challenges like climate change and food supply disruptions.

Urban Orchards creation Guide

Creating an urban orchard involves several steps:

1. **Site Selection**: Choose a sunny location with well-draining soil. Consider factors like sunlight exposure, wind, and accessibility.

2. **Choose Fruit Trees**: Select fruit trees suitable for your climate and space. Consider dwarf or semi-dwarf varieties for limited space.

3. **Soil Preparation**: Test and amend the soil if necessary. Ensure good drainage and fertility by adding compost or other organic matter.

4. **Spacing**: Plant trees at recommended distances to allow for proper growth. Consider mature tree size when spacing them out.

5. **Planting**: Dig a hole twice as wide as the root ball. Place the tree at the same depth it was in the nursery container. Fill the hole with soil, tamp it down gently, and water well.

6. **Mulching**: Apply a layer of organic mulch around the base of the trees to retain moisture, suppress weeds, and regulate soil temperature.

7. **Watering**: Provide consistent water, especially during the establishment period. Adjust watering frequency based on weather conditions and tree needs.

8. **Pruning**: Prune trees to promote strong structure and airflow. Remove dead or diseased branches and thin out crowded growth.

9. **Fertilization**: Apply balanced fertilizer in spring and mid-summer, following recommended guidelines based on tree type and soil test results.

10. **Pest and Disease Management**: Monitor for pests and diseases regularly. Use integrated pest management strategies, including physical barriers, natural predators, and safe pesticides if necessary.

11. **Pollination**: Ensure proper pollination for fruit production. Some trees may need compatible pollinators planted nearby.

12. **Harvesting**: Harvest fruit when it reaches peak ripeness. Different fruit types have varying signs of ripeness.

13. **Maintenance**: Continuously monitor tree health, prune as needed, and adjust care based on the tree's growth and changing seasons.

Remember, creating an urban orchard requires ongoing attention and care, but the reward of fresh, homegrown fruit can be very satisfying.

Acephate 75 Sp pesticides uses /Acephate dosage per acre/Acephate attack instidces

Acephate 75 Sp uses  contains 75% active ingredient acephate, which is an organophosphate compound. This insecticide is known for its broad-...