Indoor Plants watering Tips

  
1. **Frequency:** Different plants have different water requirements. Some plants prefer to dry out slightly between waterings, while others like consistently moist soil. Research the specific needs of each plant you have.

2. **Soil Type:** Well-draining soil is essential to prevent overwatering and root rot. Use potting mixes formulated for your plant types.

3. **Container:** Ensure your pots have drainage holes to prevent water from pooling at the bottom. Elevating pots on pot feet can also help with drainage.

4. **Water Amount:** Water until you see excess water draining from the bottom of the pot. Ensure thorough watering, but avoid letting the plant sit in standing water.

5. **Testing Moisture:** Stick your finger an inch or two into the soil. If it feels dry, it's time to water. If it's still moist, wait a bit.

6. **Watering Techniques:** Water the base of the plant, avoiding the leaves. Some plants are sensitive to water on their foliage.

7. **Humidity:** Some plants, like tropical varieties, appreciate higher humidity levels. You can mist them or use a humidity tray.

8. **Seasonal Changes:** Plants' water needs may vary with the seasons. They might need less water during winter when growth slows down.

9. **Temperature:** Plants generally need less water in cooler temperatures and more in warmer ones.

10. **Underwatering vs. Overwatering:** Signs of underwatering include wilting, dry soil, and yellowing leaves. Overwatering can cause wilting, yellowing, and mushy roots.

11. **Water Quality:** Use room-temperature, filtered water when possible. Let chlorinated tap water sit for a day before using to allow chlorine to dissipate.

12. **Fertilization:** Proper fertilization can influence water needs. Follow recommended fertilization schedules for your plants.

Remember, each plant is unique, so it's crucial to observe your plants closely and adjust your watering routine accordingly.

NADPE composting construction, process and Benifit

NADEP method of making miracle compost was first invented by a farmer named Narayan Deotao Pandharipande (also popularly known as “Nadepkaka”) living in Maharashtra (India).

 I can provide more information on each of those points:

**NADPE Composting Construction:**

The construction of a NADPE composting system involves creating an enclosed and controlled environment that supports anaerobic decomposition. This could be done using a variety of materials such as concrete, bricks, or even airtight containers. The key is to design a structure that maintains a sealed and oxygen-free environment to facilitate anaerobic microbial activity.


The NADPE composting process involves the following steps:

1. **Waste Collection:** Gather organic waste materials like food scraps, yard waste, and other biodegradable materials.
2. **Enzyme Addition:** Mix the waste with a specialized enzyme mixture to accelerate decomposition.
3. **Anaerobic Environment:** Place the waste and enzyme mixture in an enclosed container to create an oxygen-free environment.
4. **Microbial Breakdown:** Anaerobic microorganisms break down the organic materials, producing methane, carbon dioxide, and organic acids.
5. **Maturation:** Allow the compost to mature and stabilize over several weeks or months.
6. **Quality Control:** Monitor temperature, pH, and moisture levels to ensure proper decomposition.
7. **Compost Use:** Once matured, the compost can be used as a nutrient-rich soil amendment.


**Benefits of NADPE Composting:**

1. **Efficient Decomposition:** NADPE composting can accelerate the breakdown of organic waste compared to traditional aerobic composting methods.
2. **Reduced Odor:** The anaerobic environment minimizes odors associated with decomposition.
3. **Space Savings:** NADPE composting can be suitable for small spaces, as it doesn't require as much aeration and turning as aerobic composting.
4. **Nutrient-Rich Compost:** The resulting compost is rich in nutrients and organic matter, enhancing soil fertility and structure.
5. **Methane Capture:** The anaerobic process generates methane, which can be captured and used as a renewable energy source.
6. **Waste Reduction:** NADPE composting helps divert organic waste from landfills, reducing overall waste volume.

Remember that successful implementation of NADPE composting requires careful design, management, and monitoring. It's important to consider factors like waste composition, enzyme formulation, container design, and appropriate use of resulting compost. Consulting experts in composting or waste management can help ensure a successful NADPE composting project.

Hydroponic Tips for Strawberry growth


Introduction:
Welcome to our comprehensive guide on growing strawberries hydroponically, where we delve into the art and science of cultivating delicious and high-quality strawberries in a controlled environment. Hydroponic systems offer an efficient and sustainable way to produce strawberries with exceptional taste, texture, and nutritional value. In this guide, we will walk you through the essential steps, best practices, and tips to achieve successful hydroponic strawberry cultivation.
Section 1: Setting the Stage
1.1 Understanding Hydroponic Systems:
   - Overview of hydroponic cultivation and its benefits for strawberry growth.
   - Explanation of different hydroponic systems: NFT (Nutrient Film Technique), DWC (Deep Water Culture), and more.

1.2 Choosing the Right Varieties:
   - Selection of strawberry varieties best suited for hydroponic cultivation.
   - Considerations for yield, flavor, disease resistance, and growth habits.
Section 2: Creating the Ideal Environment
2.1 Light and Temperature:
   - Importance of proper lighting for photosynthesis and fruit development.
   - Temperature requirements and how to maintain optimal levels.

2.2 Nutrient Solution:
   - Formulating a balanced nutrient solution with essential macronutrients and micronutrients.
   - Monitoring and adjusting nutrient levels for healthy growth and maximum yield.

2.3 pH and EC Management:
   - Maintaining the correct pH range (5.5-6.5) and electrical conductivity (EC) levels.
   - Techniques for regular testing and adjustment of pH and EC.

Section 3: Hydroponic Setup and Maintenance
3.1 Choosing the Right Growing Medium:
   - Comparison of various growing mediums, such as coconut coir, perlite, and rock wool.
   - Benefits and considerations for each medium in hydroponic strawberry cultivation.

3.2 System Setup and Installation:
   - Step-by-step guide to assembling and setting up hydroponic systems for strawberries.
   - Proper spacing, irrigation, and support structures for optimal plant growth.

3.3 Water and Air Circulation:
   - Importance of adequate water and air circulation for root health and nutrient absorption.
   - Methods for preventing root diseases and ensuring optimal oxygen supply.

Section 4: Plant Care and Management
4.1 Pruning and Training:
   - Techniques for proper pruning and training of strawberry plants to encourage fruiting.
   - Removing runners and maintaining a balanced canopy.

4.2 Pollination:
   - Exploring pollination methods in hydroponic strawberry cultivation.
   - Strategies to ensure successful pollination and fruit set.

4.3 Pest and Disease Management:
   - Identifying common pests and diseases in hydroponic strawberry systems.
   - Implementing integrated pest management (IPM) strategies for prevention and control.

Section 5: Harvesting and Enjoying Your Bounty
5.1 Harvesting at Peak Ripeness:
   - Signs of ripe strawberries and proper harvesting techniques.
   - Best practices for handling and storing freshly harvested strawberries.

5.2 Nutritional Benefits and Culinary Delights:
   - Nutrient profile of hydroponically grown strawberries.
   - Creative recipe ideas to savor the delectable flavors of your homegrown strawberries.

Conclusion:
By following this comprehensive guide, you are well-equipped to embark on a successful journey of hydroponic strawberry cultivation. With careful attention to detail, the right techniques, and a passion for growing, you can enjoy bountiful yields of high-quality, flavorful strawberries right in your own hydroponic setup. Happy growing!


Sustainable practices in Hydroponic Systems

Hydroponics is a method of growing plants without soil, using a nutrient-rich water solution to provide essential minerals and elements. Implementing sustainable practices in hydroponics is crucial to reduce environmental impacts and ensure long-term viability. 

Here are some sustainable practices for hydroponic systems:

1. Water conservation: Implementing water-efficient hydroponic systems like drip or recirculating systems can significantly reduce water consumption compared to traditional soil-based agriculture.

2. Nutrient management: Carefully monitor and adjust nutrient levels in the water solution to minimize waste and prevent nutrient runoff into water bodies.

3. Energy efficiency: Utilize energy-efficient equipment, such as LED grow lights and energy-saving pumps, to reduce overall energy consumption.

4. Use renewable energy: Consider using renewable energy sources like solar or wind power to power your hydroponic system.

5. Recycled materials: Opt for using recycled materials for the construction of hydroponic setups to reduce the demand for new resources.

6. Integrated Pest Management (IPM): Implement IPM practices to minimize the use of pesticides and chemicals, promoting a more natural approach to pest control.

7. Local sourcing: Grow crops that are well-suited to your local climate and market demands, reducing the environmental impact of long-distance transportation.

8. Closed-loop systems: Implement closed-loop systems, where waste from one part of the system becomes a resource for another, reducing waste generation.

9. Organic nutrients: Whenever possible, use organic-based nutrients to support environmentally friendly and sustainable practices.

10. Composting: Compost any organic waste produced within the hydroponic system, creating a nutrient-rich soil amendment for other gardening endeavors.

11. Education and awareness: Educate yourself and others about sustainable hydroponic practices to spread awareness and encourage broader adoption.

By combining these sustainable practices in hydroponics, you can minimize environmental impact, conserve resources, and create a more resilient and eco-friendly growing system.

DIY Hydroponic project

 overview of a DIY hydroponic project

 However, due to the limited space here, I'll give you the general steps and components needed. For a more detailed guide, you may need to search for specific tutorials online.
Materials needed:

1. Container or reservoir
2. Growing medium (e.g., clay pellets, rockwool, perlite)
3. Nutrient solution
4. Submersible pump
5. Air pump (optional for oxygenation)
6. Air stone (if using an air pump)
7. Net pots or containers for plants
8. pH meter and pH adjusters
9. Hydroponic nutrients

Steps:
1. Choose a suitable container for your hydroponic system. It could be a bucket, tote, or any watertight container.

2. Place the growing medium into net pots or containers, which will hold the plants.

3. Set up the submersible pump in the reservoir to circulate the nutrient solution.

4. If desired, add an air pump and air stone to increase oxygenation in the nutrient solution.

5. Mix the hydroponic nutrient solution according to the manufacturer's instructions and adjust the pH level.

6. Place the net pots or containers with the plants into the growing medium.

7. Ensure the roots are submerged in the nutrient solution, but not fully covered.

8. Set up a suitable lighting system to provide the plants with enough light for proper growth.

9. Monitor the nutrient levels and pH regularly and make adjustments as needed.

10. Harvest your hydroponically grown plants when they reach maturity.

Remember to research further and follow safety guidelines while working on your DIY hydroponic project. Happy gardening!

98 Hydroponic Farming Tips

Here are 98 tips for hydroponic farming:
1. Start by researching and understanding hydroponic systems and techniques.
2. Choose a suitable location with adequate light and temperature control.
3. Select the right type of hydroponic system for your crops and space.
4. Ensure good water quality by using filtered or purified water.
5. Monitor and maintain proper pH levels for optimal nutrient absorption.
6. Keep a log of your hydroponic system's performance and adjustments made.
7. Use high-quality, nutrient-rich hydroponic solutions for your plants.
8. Regularly check for nutrient deficiencies and adjust accordingly.
9. Clean and sanitize your hydroponic system regularly to prevent algae and bacterial growth.
10. Use a timer to automate the watering schedule for your plants.
11. Install a backup power supply to avoid disruptions during power outages.
12. Use a nutrient film technique (NFT) system for quick-growing plants like lettuce and herbs.
13. Implement a deep water culture (DWC) system for growing larger plants like tomatoes and peppers.
14. Consider using an ebb and flow system for root zone aeration and nutrient uptake.
15. Opt for a drip irrigation system for precise nutrient delivery to each plant.
16. Insulate your hydroponic setup in colder climates to maintain proper temperatures.
17. Use hydroponic-friendly substrates like rockwool, clay pellets, or coco coir.
18. Regularly check and clean hydroponic system pumps and filters.
19. Introduce beneficial insects or biological controls to manage pests naturally.
20. Provide proper support for vertical growth crops to avoid damage and promote healthy growth.
21. Train plants early on to control their shape and encourage higher yields.
22. Use reflective materials around the growing area to maximize light exposure.
23. Implement a trellis system for climbing plants like cucumbers and beans.
24. Monitor and maintain optimal humidity levels to prevent mold and mildew growth.
25. Consider using hydroponic additives to enhance plant growth and flowering.
26. Prune and remove dead leaves to improve air circulation and prevent disease spread.
27. Implement a light schedule suitable for each plant's growth stage.
28. Install a pH controller to automate pH adjustments as needed.
29. Test your hydroponic system's water quality regularly to ensure nutrient balance.
30. Avoid over-fertilizing, as it can lead to nutrient lockout and plant stress.
31. Integrate a CO2 enrichment system to boost plant growth.
32. Use shade cloth during hot periods to protect plants from excessive heat.
33. Keep a record of plant growth milestones to track progress and make improvements.
34. Maintain appropriate spacing between plants to prevent overcrowding.
35. Introduce aeration in the nutrient solution to improve root health.
36. Use a water chiller in warmer climates to maintain optimal water temperature.
37. Integrate a water heater to prevent temperature fluctuations during colder months.
38. Train yourself in recognizing common plant diseases and their treatments.
39. Implement a pest management plan to deal with unwanted insects effectively.
40. Monitor and adjust light intensity as plants grow to avoid burning or stretching.
41. Regularly inspect the roots for signs of root rot or other issues.
42. Consider using a reverse osmosis system to purify water for hydroponics.
43. Use a separate reservoir for each nutrient solution component to prevent precipitation.
44. Avoid using metal containers for nutrient solutions to prevent potential toxicity.
45. Consider vertical farming for maximizing space and increasing yields.
46. Use hydroponic-friendly plant varieties suited for your climate and system.
47. Install temperature and humidity monitors to keep conditions in check.
48. Provide proper ventilation to maintain a healthy environment for plant growth.
49. Automate nutrient solution mixing and delivery for consistent plant feeding.
50. Implement a float valve system to maintain consistent water levels in the reservoir.
51. Consider implementing a hydroponic system with a recirculating water feature.
52. Implement a water level indicator to monitor water levels in the system.
53. Use net pots to securely hold plants in place while allowing roots to grow freely.
54. Create a maintenance schedule for regular system checks and adjustments.
55. Inspect and clean hydroponic system components thoroughly during downtime.
56. Rotate crops in different hydroponic systems to avoid nutrient depletion.
57. Use organic hydroponic nutrients for eco-friendly farming practices.
58. Experiment with different hydroponic techniques to find the most suitable one for your needs.
59. Monitor and control temperature fluctuations in the root zone for healthy root growth.
60. Inspect water pumps and air stones regularly to ensure proper functioning.
61. Use shading devices during intense sunlight periods to protect delicate plants.
62. Integrate a rainwater collection system to supplement your water supply.
63. Implement a root zone heating system for faster plant growth during colder months.
64. Avoid using tap water high in chlorine or other harmful substances.
65. Use plant-safe LED grow lights for energy-efficient and effective plant growth.
66. Implement an automatic pH dosing system to maintain stable pH levels.
67. Monitor and control EC levels to ensure proper nutrient concentration for plants.
68. Introduce a pest exclusion netting to keep unwanted insects away from crops.
69. Use a hygrometer to monitor and maintain proper humidity levels.
70. Train plants to grow in a particular direction to optimize space utilization.
71. Introduce mycorrhizal fungi to enhance nutrient absorption and root health.
72. Use a light mover system to distribute light evenly across all plants.
73. Provide support for fruit-bearing plants to prevent stem breakage under heavy loads.
74. Implement a drip-to-waste system for better nutrient management and control.
75. Use light reflectors to ensure maximum light penetration throughout the canopy.
76. Integrate an automatic nutrient dosing system to maintain precise nutrient levels.
77. Rotate the water reservoir periodically to avoid uneven plant growth.
78. Use a water-testing kit to check for any nutrient imbalances regularly.
79. Monitor and control relative humidity levels during the flowering stage to prevent mold.
80. Implement an ozone generator for sterilizing the water and preventing algae growth.
81. Integrate CO2 supplementation during the flowering stage to enhance yields.
82. Provide support for tall or heavy plants to prevent them from toppling over.
83. Consider using beneficial bacteria products to promote a healthy root zone.
84. Create a daily task list to stay organized and on top of your hydroponic garden.
85. Use a separate quarantine area for new plants to prevent introducing pests.
86. Implement a drip irrigation system with pressure regulators for consistent water flow.
87. Provide shade for young seedlings to prevent stress from intense light.
88. Use an air pump to improve oxygenation in the nutrient solution.
89. Train plants to grow horizontally for better light distribution and airflow.
90. Implement a light and dark cycle for plants that require specific photoperiods.
91. Use hydrogen peroxide as a natural way to control algae growth in the reservoir.
92. Monitor plant growth rates to identify any potential issues early on.
93. Integrate an automatic timer to control the light cycle for different plant stages.
94. Install a backup water supply system to avoid running out of water.
95. Use a root zone thermometer to monitor temperature variations at the roots.
96. Regularly check for pests on the underside of leaves and stems.
97. Experiment with different nutrient combinations to find the ideal formula for your crops.
98. Implement a water circulation system to prevent stagn

Vertical hydroponic gardening and Methods

       Vertical hydroponic gardening 

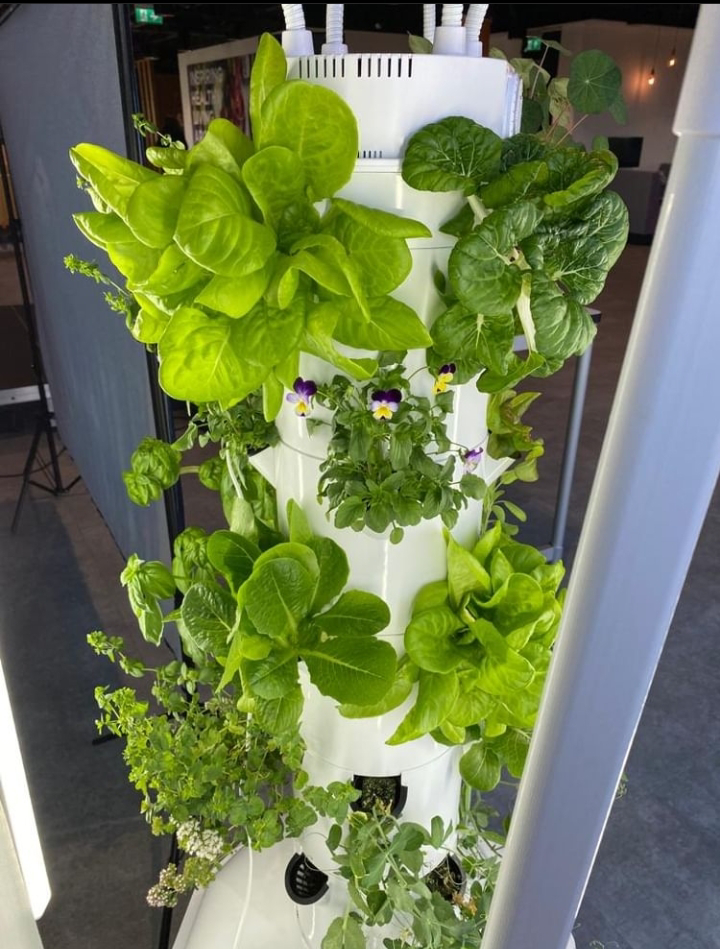
Vertical hydroponic gardening is a technique that allows plants to grow without soil, using a vertical structure to maximize space and improve efficiency. Here are the full details of this gardening method:
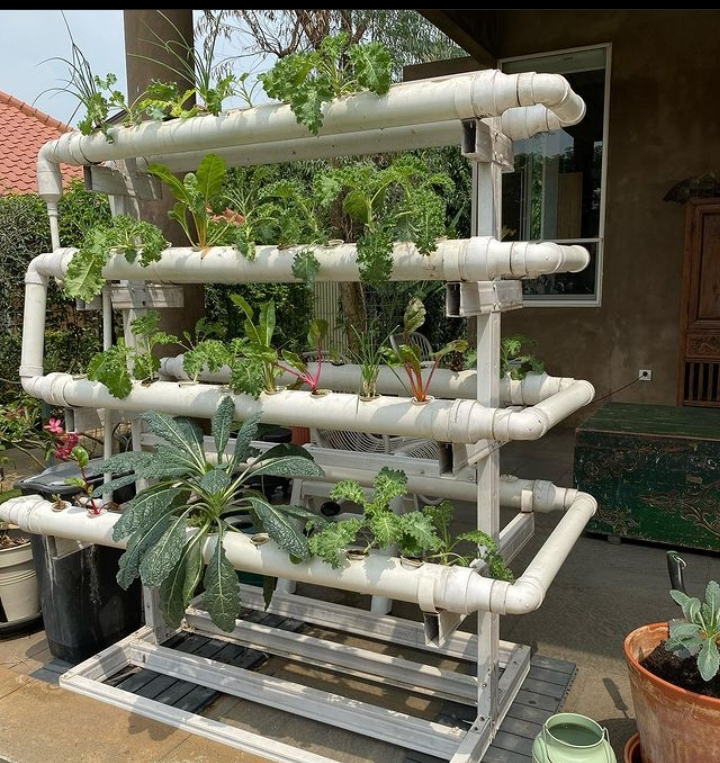
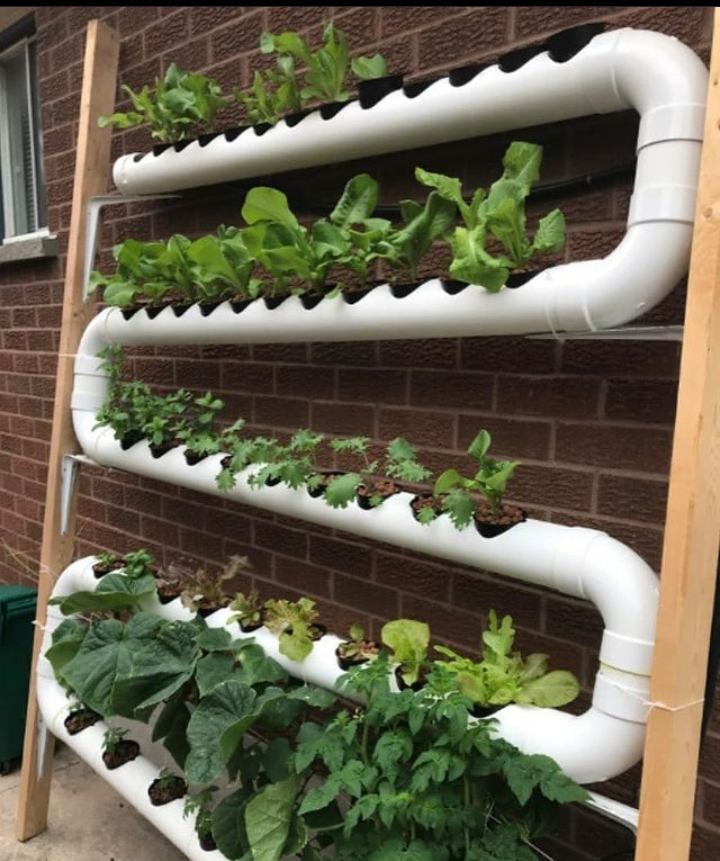
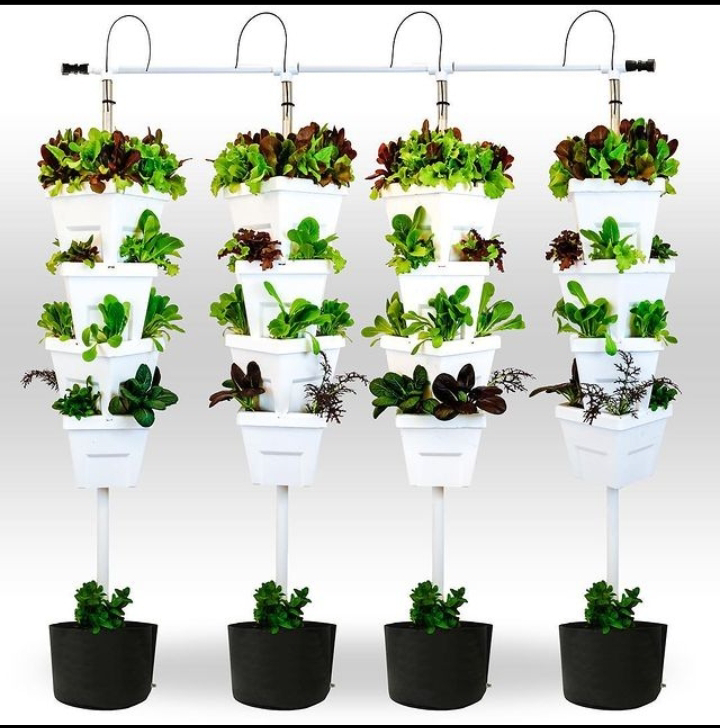
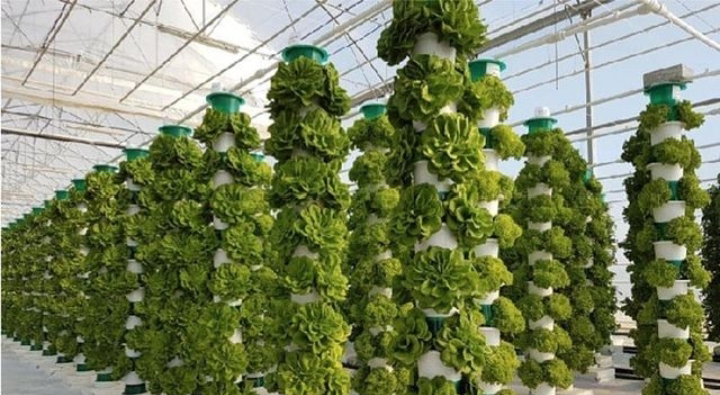
1. Structure: The vertical hydroponic system consists of stacked or tiered trays or shelves, allowing plants to grow upward. The structure can be made of various materials, such as PVC pipes, gutters, or specialized vertical towers.
2. Nutrient solution: Instead of soil, plants receive their nutrients through a water-based solution that contains essential minerals and nutrients. This solution is circulated through the system, ensuring all plants get the required nourishment.

3. Growing medium: Some vertical hydroponic systems may use a growing medium like coconut coir, perlite, or rockwool to support plant roots and retain moisture.

4. Water circulation: The nutrient solution is typically delivered to the top tray and allowed to flow down through the system, reaching each plant's roots. The excess solution is collected and recycled to minimize wastage.

5. Lighting: Adequate artificial lighting is crucial for indoor vertical hydroponic gardens, especially in locations with limited sunlight. LED grow lights are commonly used as they provide the right spectrum for plant growth.

6. Plant selection: Various vegetables, herbs, and even some fruits can thrive in vertical hydroponic systems. Common choices include lettuce, spinach, basil, and strawberries.

7. Maintenance: Regular monitoring of the nutrient levels, pH balance, and water circulation is essential. Pruning and harvesting should also be done as needed to ensure healthy plant growth.

8. Benefits: Vertical hydroponic gardening maximizes space utilization, reduces water usage, and minimizes the risk of pests and diseases associated with traditional soil-based gardening.

9. Challenges: Initial setup costs and the need for proper lighting and nutrient management can be challenges. However, the long-term benefits can outweigh the initial investment.
Overall, vertical hydroponic gardening is an innovative and efficient way to grow plants indoors or in limited spaces, providing fresh produce throughout the year.

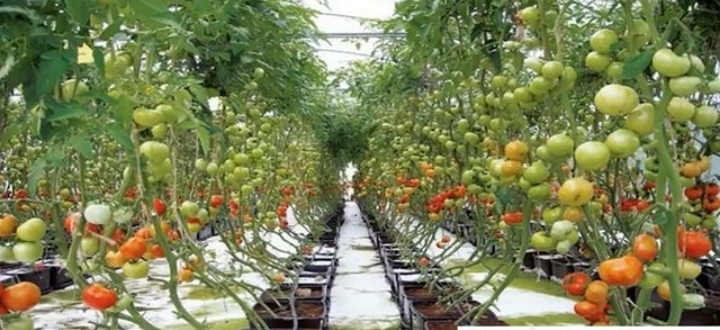
12 Steps in Hydroponic Tomato Growing

here are the full details of hydroponic techniques in tomato growing:

Hydroponics is a soilless method of cultivating plants, including tomatoes, by providing all the essential nutrients directly through water. It offers several advantages, such as higher yield, faster growth, and better control over the growing environment. 
Here's a step-by-step guide to hydroponic tomato growing:

1. Choose the Hydroponic System:
   There are different hydroponic systems available, such as Deep Water Culture (DWC), Nutrient Film Technique (NFT), Drip System, and Ebb and Flow System. Choose the one that suits your requirements and available space.

2. Select Tomato Varieties:
   Opt for tomato varieties that are well-suited for hydroponic growth. Cherry tomatoes and determinate varieties are often preferred due to their compact size and shorter growing period.

3. Prepare the Growing Medium:
   Commonly used hydroponic growing mediums include perlite, vermiculite, rockwool, and coco coir. These provide support to the plants while allowing for good root aeration and water retention.

4. Set Up the Hydroponic System:
   Follow the manufacturer's instructions to assemble and set up your chosen hydroponic system. Ensure it's equipped with a reservoir, nutrient solution pump, and proper drainage.

5. Provide Nutrient Solution:
   Create a balanced nutrient solution with essential elements like nitrogen, phosphorus, potassium, calcium, and magnesium. Regularly check and adjust the pH level of the solution to maintain optimal nutrient uptake by the plants.

6. Germination and Seedling Stage:
   Start your tomato seeds in a separate germination medium before transferring them to the hydroponic system. Maintain the ideal temperature and humidity to promote healthy seedling growth.

7. Transplanting:
   Once the seedlings have developed roots and grown a few sets of leaves, transplant them into the hydroponic system. Carefully handle the roots to avoid damage.

8. Provide Proper Lighting:
   Tomatoes require adequate light for healthy growth. Use high-quality grow lights with the appropriate spectrum (blue for vegetative growth, red for flowering) and ensure the plants receive 12-16 hours of light per day.

9. Temperature and Humidity:
   Maintain optimal temperature and humidity levels for tomato growth, usually around 20-25°C (68-77°F) during the day and slightly cooler at night.

10. Pollination:
    In a hydroponic setup, manual pollination may be necessary. Gently shake the plants or use a small brush to transfer pollen from one flower to another.

11. Pruning and Training:
    Regularly prune the tomato plants to remove unnecessary foliage and suckers, directing energy towards fruit production. Use stakes or trellises to support the plants as they grow.

12. Monitor and Maintain:
    Regularly check the nutrient solution levels, pH, and overall plant health. Adjust nutrient levels and perform system maintenance as needed.

By following these hydroponic techniques, you can grow healthy and productive tomatoes year-round in an indoor environment. Remember to research and adapt the specifics of your hydroponic system to achieve the best results.

10 Steps of Herbs Growing in Hydroponic Systems

What is the Hydroponics System?

Hydroponics is an efficient method of growing plants without soil, and it's particularly well-suited for cultivating herbs.
  Here's a step-by-step guide to growing herbs using hydroponics:

1. **Selecting Herbs:** Choose the herbs you want to grow. Common herbs like basil, mint, parsley, cilantro, oregano, and thyme are excellent choices for hydroponic systems.
2. **Hydroponic System:** Select a suitable hydroponic system. There are various types, such as Deep Water Culture (DWC), Nutrient Film Technique (NFT), and Ebb and Flow (Flood and Drain), among others.
3. **Growing Medium:** Instead of soil, you'll need a growing medium to support the plants' roots. Popular options include Rockwool, perlite, clay pellets, or coconut coir.

4. **Nutrient Solution:** Create a balanced nutrient solution containing essential minerals and nutrients needed for plant growth. Follow the instructions on the hydroponic nutrient package and adjust the solution's pH level to ensure optimal nutrient absorption.
5. **Planting:** Gently transplant your herb seedlings or cuttings into the chosen growing medium. Ensure the roots are well-covered and supported.

6. **Lighting:** Provide adequate artificial light or place the hydroponic system in an area with sufficient natural sunlight. Most herbs require at least 6-8 hours of light daily.

7. **Watering and Nutrient Supply:** Monitor the water level in the system, and regularly top up with the nutrient solution to maintain the proper level. Avoid overwatering as it can lead to root rot.

8. **Temperature and Humidity:** Maintain the ideal temperature and humidity range suitable for the specific herbs you're growing. Generally, a temperature between 18-26°C (65-80°F) and humidity around 40-60% works well for most herbs.

9. **Pruning and Harvesting:** Regularly prune your herbs to encourage bushier growth and remove any unhealthy or wilted parts. Harvest the herbs when they reach the desired size and maturity, but ensure not to harvest more than one-third of the plant at once.

10. **Pest and Disease Management:** Keep an eye out for any pests or diseases that may affect your herbs. Implement preventive measures like maintaining cleanliness and using organic pest control methods if necessary.

Remember to follow the specific requirements of each herb, as they may have individual preferences regarding light, water, and nutrients. With proper care and attention, you'll be able to grow fresh and flavorful herbs throughout the year using hydroponics!

Hydroponic Crop Selection

Choosing the best crops for hydroponics

Choosing the best crops for hydroponics depends on various factors such as your location, available resources, and personal preferences. 

However, some popular hydroponic crops include:

1. Leafy greens: Lettuce, spinach, kale, and arugula are easy to grow in hydroponic systems and have a relatively short growth cycle.

2. Herbs: Basil, cilantro, mint, and parsley thrive in hydroponic setups and provide aromatic and flavorful additions to your dishes.

3. Tomatoes: Vine tomatoes or cherry tomatoes can be grown vertically in hydroponic systems, yielding delicious fruits.

4. Cucumbers: Suitable for larger hydroponic setups, cucumbers produce long, refreshing fruits.

5. Peppers: Bell peppers or chili peppers can be cultivated in hydroponic systems, offering a range of vibrant colors and flavors.
When selecting crops, consider the following factors:

- Light requirements: Some crops need more light than others, so ensure your hydroponic system provides adequate lighting.

- Nutrient demands: Different crops have varying nutrient requirements. Ensure your nutrient solution matches their needs.

- Space and growth habits: Choose crops that fit well within the space available in your hydroponic setup and consider their growth habits.

- Temperature and humidity: Opt for crops that can tolerate the temperature and humidity levels in your growing environment.

By carefully considering these factors and conducting research on specific crops, you can make informed choices for a successful hydroponic garden.

Acephate 75 Sp pesticides uses /Acephate dosage per acre/Acephate attack instidces

Acephate 75 Sp uses  contains 75% active ingredient acephate, which is an organophosphate compound. This insecticide is known for its broad-...